Printer backup and recovery tips
Learn the best way to back up and recover your printers when you upgrade a server from Windows Server 2003 to Windows Server 2008.

What you will learn in this tip: An important step that shouldn't be overlooked when upgrading a Windows server is backing up your printers. Learn printer backup and recovery techniques in this tip.
There are many different issues that must be taken into account when you upgrade a server from Windows Server 2003 to Windows Server 2008. One often overlooked upgrade issue involves the fact that printers on computers running Windows Server 2003 (with the Print Management console) or Windows Server 2008 R2 are incompatible with Windows Server 2008. As such, any existing printers are deleted during the upgrade process.
Thankfully, you don’t have to manually set up all of your printers from scratch after a server upgrade completes. There is a way that you can back up your printers prior to the operating system upgrade and then restore the backup directly into the new operating system.
Backing up your printers
The first step that you must perform is to back up all of the printers that are defined on the Windows Server 2003 or Windows Server 2003 R2 machine that you plan to upgrade. The problem is that neither of these operating systems contain a mechanism for backing up printers. That being the case, you will have to perform the backup using either Windows Vista or Windows 7. For the purposes of this tip, I will be demonstrating the backup process using Windows 7, but the process is very similar in Windows Vista.
Begin the printer backup process by entering the MMC command at the Run prompt. This will cause Windows to open an empty management console. Then, choose the Add / Remove Snap-in command from the console’s File menu. When you do, you will see a list of all the snap-ins that are available. Select the Print Management snap-in, and click Add.
At this point, you will see a dialog box asking you to specify the print server, as shown in Figure 1 below. Enter the name of the server you plan to upgrade and then click the Add to List button, followed by the Finish button. Click OK to continue.
Figure 1: Specifying the name of the server
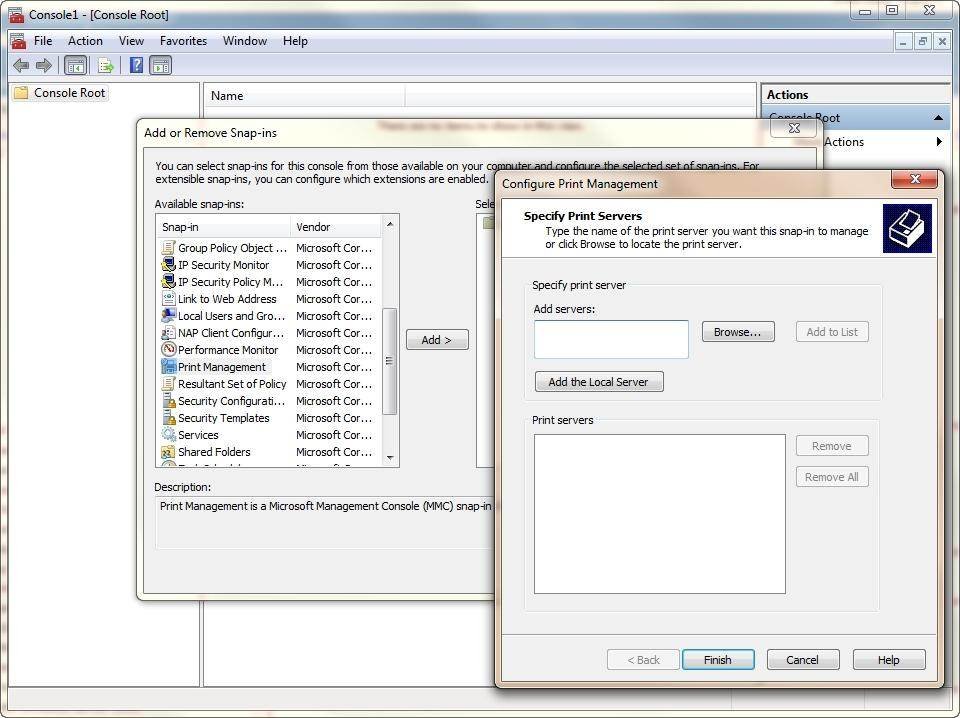
You must specify the name of the server whose printers you want to backup.
Depending on how your network is configured, you might see a message telling you that print management cannot function because the Windows Firewall is enabled. If you encounter such a message, click Yes to enable the firewall printer sharing exception.
Once the console has been loaded, you will need to verify that you can see all of the server’s printers. To do so, navigate through the console tree to Print Management | Print Servers | <your server> | Printers. When you select the Printers container, you should see all of the printers that are installed on the server.
Now that you have verified your connection to the server, it is time to perform the backup. To do so, right click on the Print Management container and choose the Migrate Printers command from the shortcut menu, as shown in Figure 2 below.
Figure 2: Right click on the Print Management container
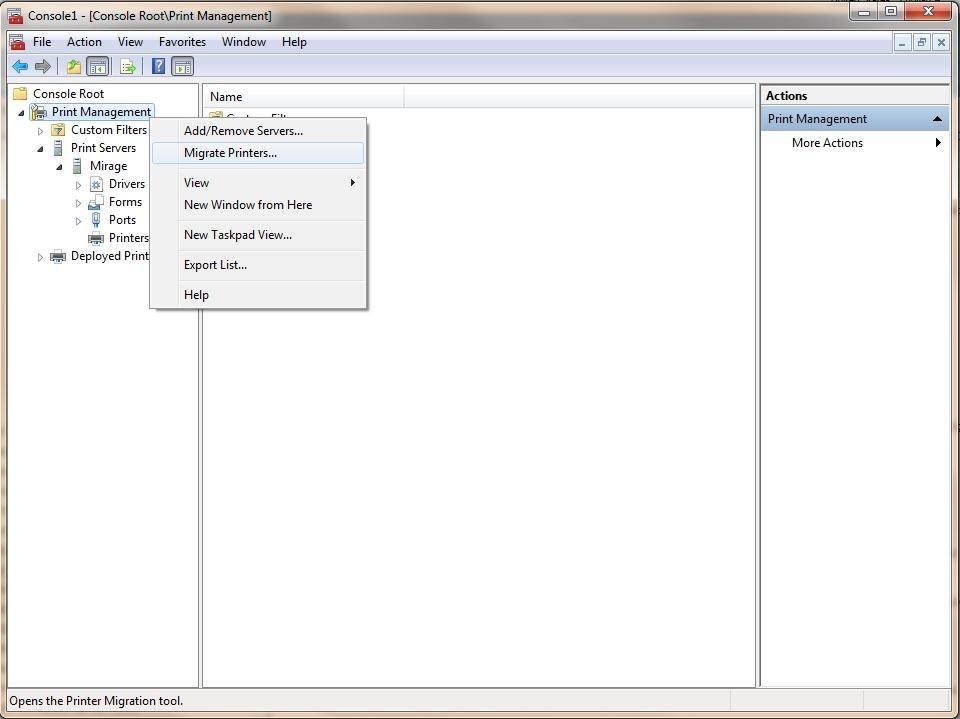
Right click on the Print Management container and select the Migrate Printers command from the shortcut menu.
When the Printer Migration Wizard opens, choose the Export Printer Queues and Printer Drivers to a File option and click Next. The next screen will ask you if you want to use This Print Server or A Print Server on the Network. You will have to choose the network print server option and then specify the name of the server that you plan to upgrade. Click Next and you will see a summary of the print queues and print drivers that are about to be exported. When prompted, specify the path to which you want to save the file and then click Next to perform the backup. When the process completes, click Finish.
Restoring your backup
Now that the printers have been backed up you can safely upgrade your server. When the upgrade process completes, you will have to use the Server Manager to add the Print Services role. Once this role has been installed, you can restore your backup.
The restoration process is very similar to the backup process. Begin by selecting the Print Management command from the server’s Administrative Tools menu. When the Print Management console opens, right click on the Print Management container and choose the Migrate Printers command from the shortcut menu.
When the Printer Migration Wizard begins, choose the Import Printer Queues and Printer Drivers From a File option and then click Next. You will now be prompted to specify the path to the file that you want to import. After doing so, click Next. You will be prompted to specify your preferred import options. Click Next three more times, followed by Finish and the restore process will be complete.
Although it is important to back up network printers before performing a server upgrade, it can be handy to create printer backups even if no upgrade is planned. You never know when a printer might accidentally be deleted and it is easier to restore a printer backup than a full server backup.
About the author: Brien M. Posey, MCSE, has previously received Microsoft's MVP award for Exchange Server, Windows Server and Internet Information Server (IIS). Brien has served as CIO for a nationwide chain of hospitals and was once responsible for the Department of Information Management at Fort Knox. You can visit Brien's personal website at www.brienposey.com.